
Honda 1/2 Radiator InstallThis write up is for those that want to install the “Honda ½ Radiator”. A great mod for turbo or NA. For turbo, it allows room in the engine bay and for NA it allows a large “cold air” opening. You can install it on either side of the car; passenger or driver side. First you need to remove the old radiator; It’s very simple to take out. Just empty the coolant system and pull off the upper and lower radiator hoses. Then pull off the two brackets on top of the radiator (4 bolts). At this point, the radiator will pull right out, but first you must unplug the fans. Now simply pull up them radiator. It is housed in rubber grommets on the bottom. It will pull right out of these. Then put the radiator to the side (I only had one fan on); You need to prep your new radiator. Obviously, we have our own filler on the thermostat housing. You cannot leave the filler and radiator cap on the new radiator. You need to block this off. Cut the filler off and weld it up. 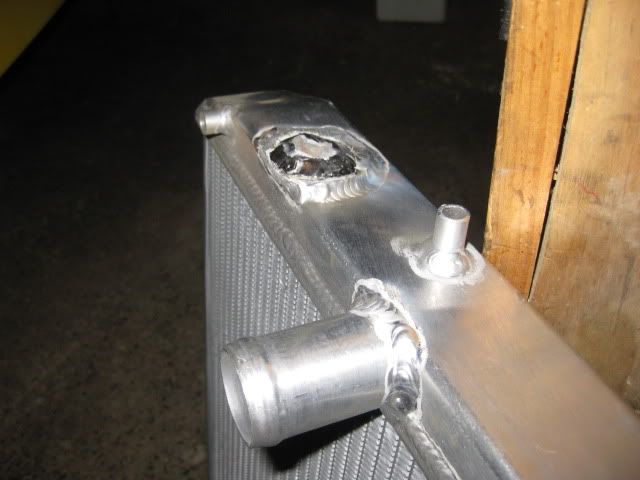 Now that you have pulled the radiator and prepped the new radiator, you need to stick the new radiator in its place (I’m using the passenger side. If you are going turbo, you may want to use the driver side to give you more room for the turbo set-up. Either way the process is basically the same). I put the radiator in place and used some quick clamps to hold it there (I forgot to take a pic when I was doing it. But here is a pic after the fact showing the position of the clamps I used). 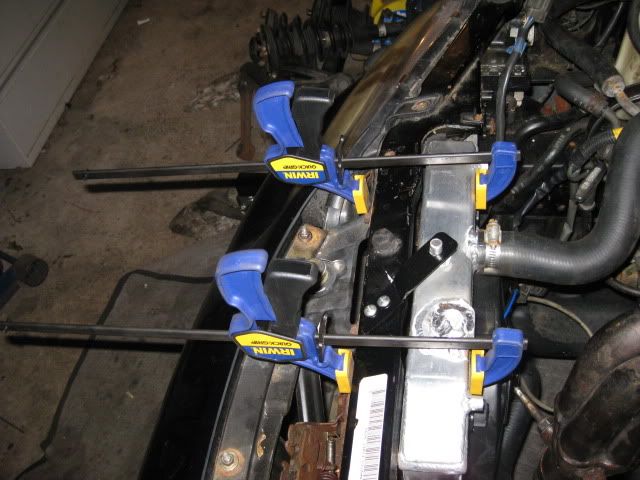 I set the radiator on the old radiator rubber mount, just for support. I took that rubber out after I did the mounts. The top supports for the radiator work wonderfully for the bottom support of the new radiator. So go underneath the new radiator and place the upper radiator supports around the lower posts of the new radiator and make marks where you are going to bolt/screw your new mounts on (like this); 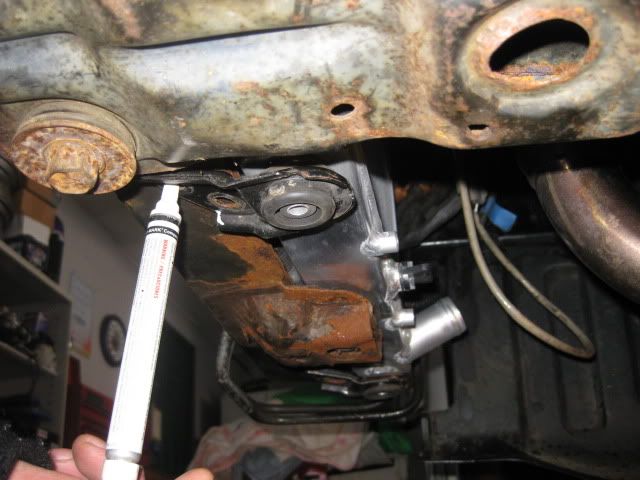 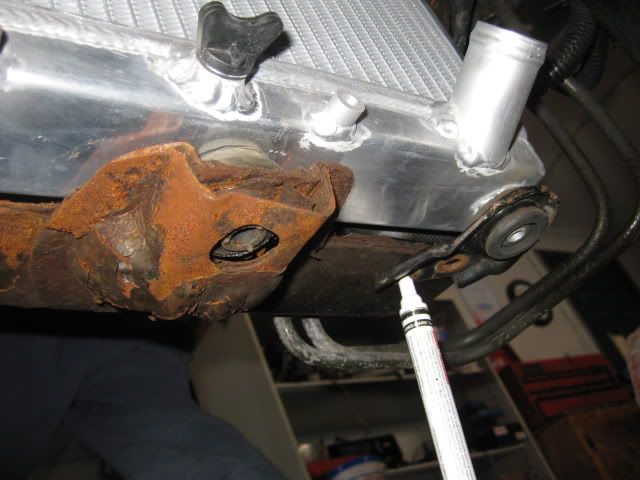 Be sure that you have the brackets the correct way. They have a bend in them that will either make your radiator lower or higher. Be sure to use the bracket in the direction that makes it lower (in this direction):  Otherwise, you may send the radiator up too high and hit the hood. Now you need to drill out your holes where you are going to screw/bolt (depending on what you are using to adhere the brackets. I used screws).  Be very careful when you drill through! There is a wiring harness within that channel and you don’t want to screw into the wires! Once you have made your appropriate holes, just screw/tighten them down (like this); 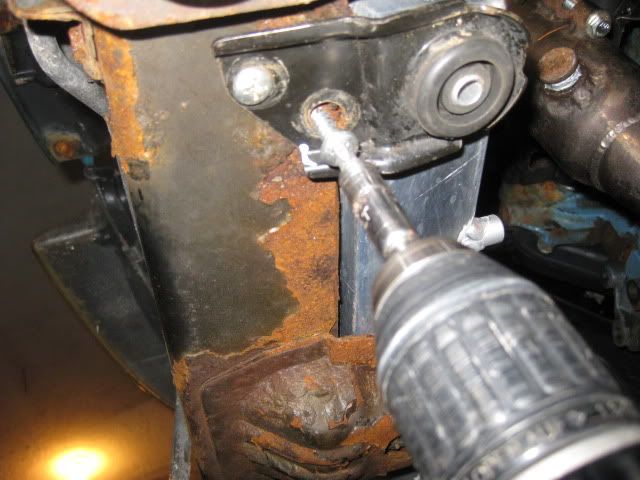 You can now remove the clamps, and, if done properly, the radiator will stay in place. When you put the radiator in place, you may see some points where the radiator is real close to the metal surrounding it (or even contacting). You will want to have some kind of buffer in there (in case of vibration etc.) I use this in those cases;  Simply stick it in anyplace where the body of the radiator may vibrate metal on metal. Though it won’t actually touch once I am done with the mounting, I stuck a piece here (for safety); 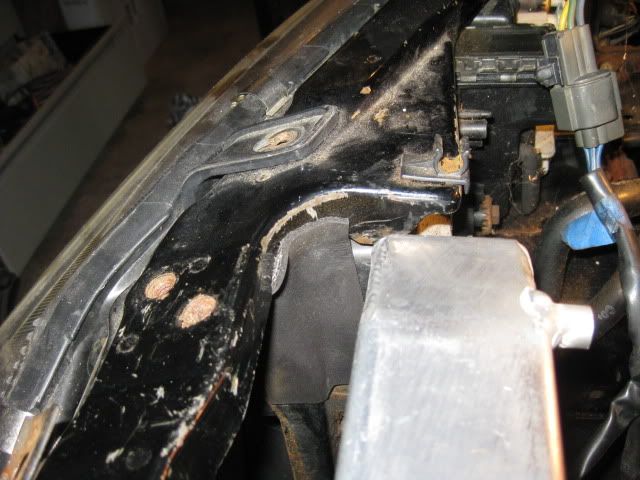 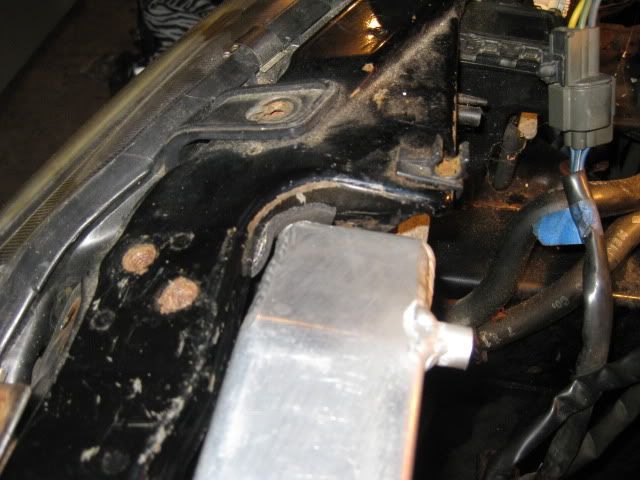 Time to install a top mount. There is a post on top of the radiator to work with. Making this mount is fairly simple. First look through your junk metal pile. Everyone should have a junk metal pile to work with. Just various pieces of metal that are saved “just in case” from odd ball places. Here is a pic of some of mine; 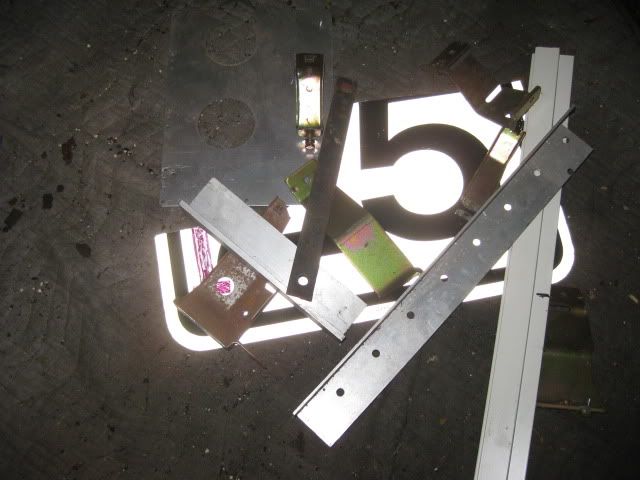 Look in that pile and voila’, I find a flat bar that has a hole already in it that fits the post; 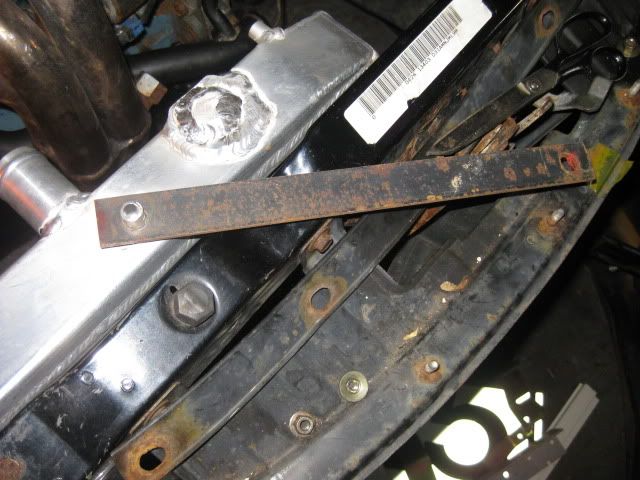 Just cut it and bend it and grind it and paint it and pretty soon you have a pretty good looking bracket that fits (I just drilled the holes for the screws like I did with the bottom brackets); 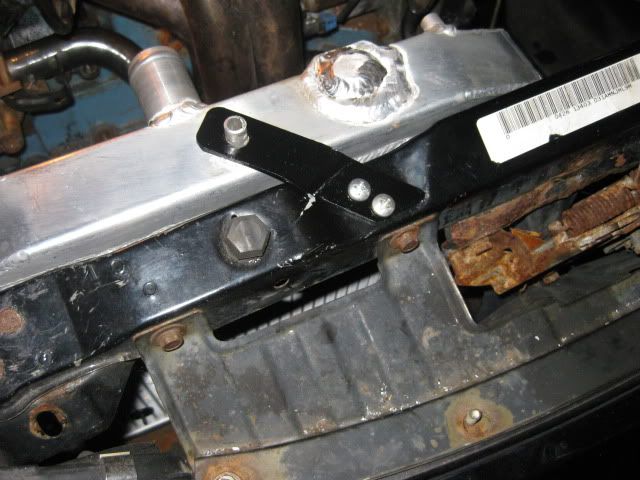 Now that its mounted, you will need to do hoses. What I normally would do is look through my hose drawer and find hoses that I can cut up and connect to make it work. But this time I thought I may go to the store and search through the rack to see if I can make it easier for you to find the right hoses. So I found this hose at NAPA; 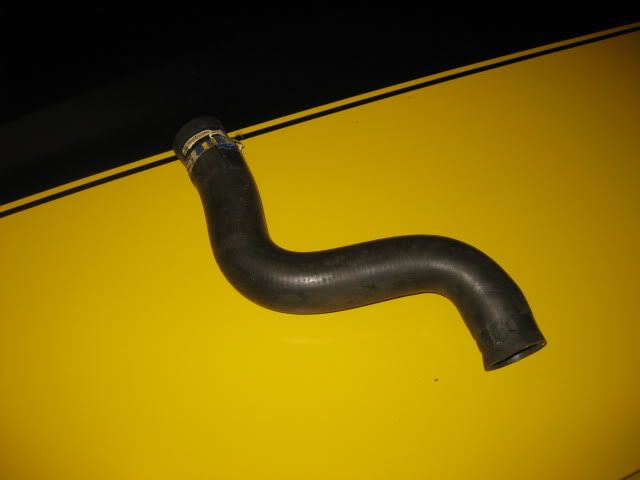 It is NAPA part number 8791. I Believe that is the upper radiator hose for a 95-99 SOHC Neon. It is almost a straight on fit. You just have to cut off a small part on the radiator end so it will not pinch. Cut like this;  Now the bottom. Here I used two different hoses. They were from Advance Auto. The first one will go to the lower radiator fitting (with some adaptation). It looks like this:  It is Advanced Auto part number D71718 (again if anybody can get the application it would be helpful) . And for the water pipe side (at the engine), I used this hose from Advanced Auto): 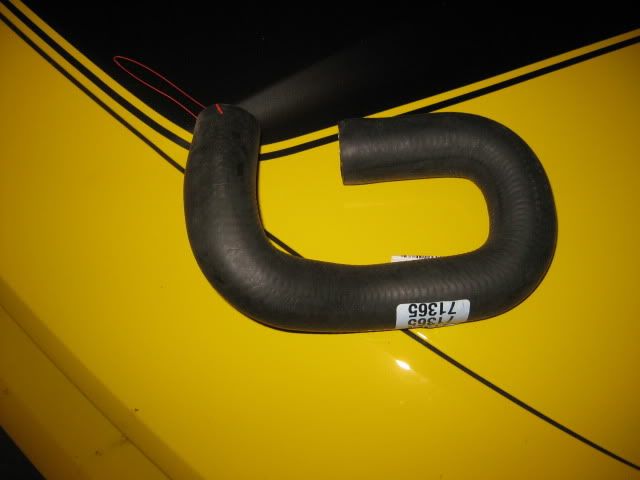 It is Advanced Auto part number B71365 (ditto on application). I needed it basically for the U shape bend. Then slide them both on, so you could “eyeball” where your joint was going to take place;  You can see from the pic where the obvious place to make a joint is. So I made a mark and cut both hoses at that spot (no pic of fresh cut). Now you need to splice them together. Again, not rocket science. You simply need to find a short pipe that will not be affected by the coolant and can put up with being clamped around without breaking down. I had an extra water pipe kicking around, so I cut off the end of that so I could use it as a splice; 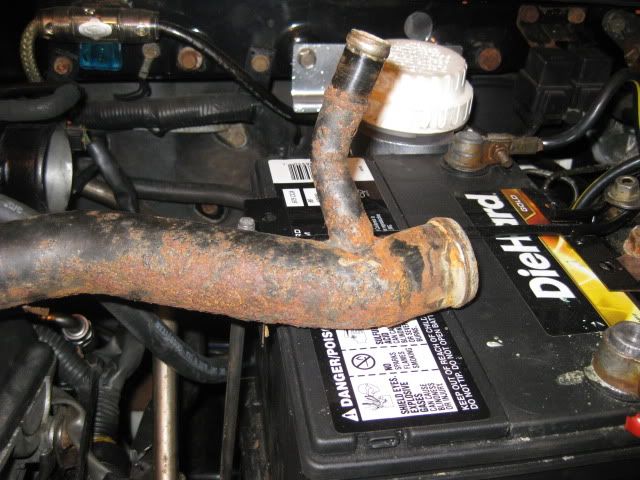  You can see in the second pic that I sent the pipe through the wire wheel to clean it up. Now simply slide one end into one hose (at the joint) and clamp it. Then send the other end into the other hose and clamp. It should look something like this; 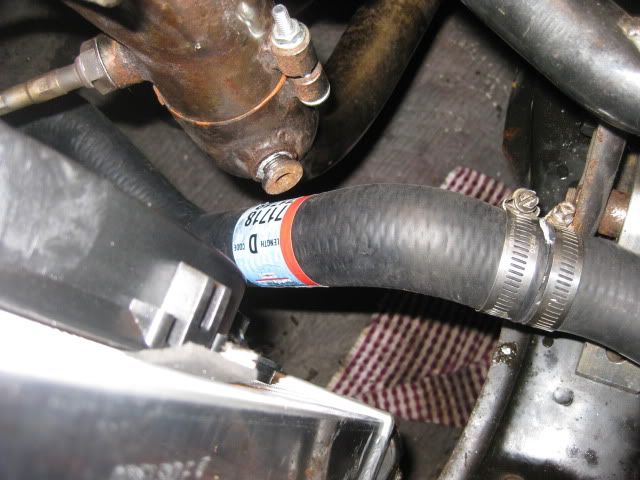 I didn’t like how close it was to the exhaust, so I cut down the hose on the lower radiator side so it would move a little away from the exhaust (forgot to take a picture of that) You can also use zip ties or heater wrap or both etc. Now clamp all the ends (top and bottom and joint) and you are ready to move onto the fan. For the fan, first attach the fan to the radiator (lots of different ways to do this. This one came with the plastic push through connectors). 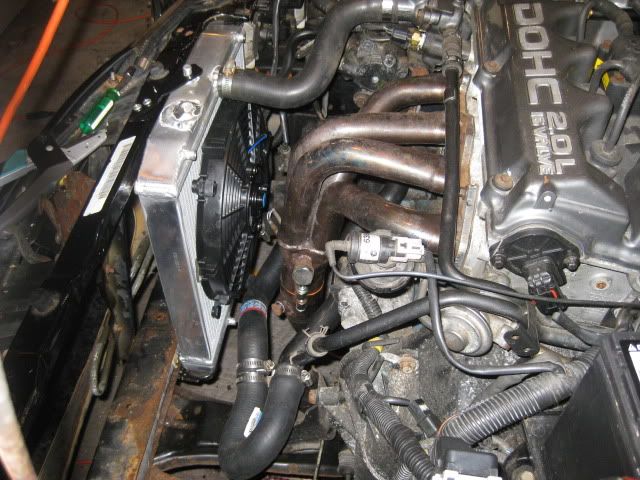 Now you will need to wire it up. The driver side connector is the one you want to use. It is the primary, whereas the passenger side is the secondary (used for the AC). There are two wires coming off the driver’s side connector; blue and black. I had to extend the wires to reach, but here is a pic of the wires stock;  Blue is your power wire while black is your ground wire. On aftermarket fans, you will generally have just two wires; a power and a ground. In my case the power was blue and the ground was black. So I connected up the blue wire on the car connector, to the blue wire on the fan. And likewise for the black to black wire.  A little hard to see but it works. Then manage your wires up however you want (just a note here. You may have different reasons for making a fan push air [called a pusher] and making a fan pull air [called a puller]. To change air directions all you have to do is switch the wires. If you want the fan to be a “puller’ then wire it up as I instructed. If you want it to be a “pusher” – say if you mounted it on the opposite side of the radiator - you would connect the black to the blue and the blue to the black. That would switch the polarity of the fan and make the blades move in the opposite direction) At this point you may want to check to be sure the fan works. You can do this without turning anything on. Simply go to the fusebox in the engine bay, pop the cover and you should see these relays in a row from top to bottom (middle of fuse box);  The relay you want to pull out to test the fan is the top relay (see the one I pulled out in this pic);  Then grab/make a jumper wire and stick it in the two slots shown in this pic; 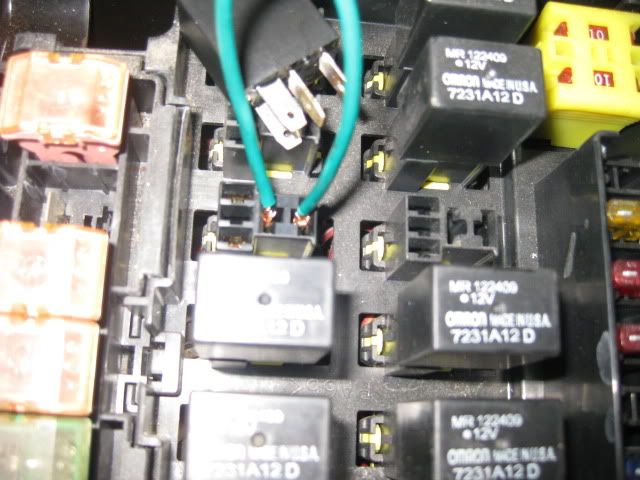 The slot to the right is the constant 12v power and the slot to the left sends the signal to the fan to turn on. If you jump these with a wire, your fan will automatically turn on (no need to turn key or anything). If it doesn’t turn on, you’ll have some trouble shooting to do. If it does, then you can fill the radiator up and do all your regular testing/filling to be sure that you have a full system (keep in mind that you cut your radiator in half, so you won’t need as much coolant in the system as stock). And now off you go. written by bullettdsm bpu |
| Document statistics: Last modified on 2011-11-05 16:26:35 by bullettdsm |
