

Power Windows/Locks/Mirrors Conversion InformationThis wiki page is mainly going to be a collection of various helpful information for those with a RS wishing to convert to Power Windows/Locks/Mirrors. Power Window RelayOk, under your drivers side dash, right under the kick panel you will see a fuse box. The power options are run off of one relay, Mitsubishi part number MR122409. For size reference it is about the size of a quarter. 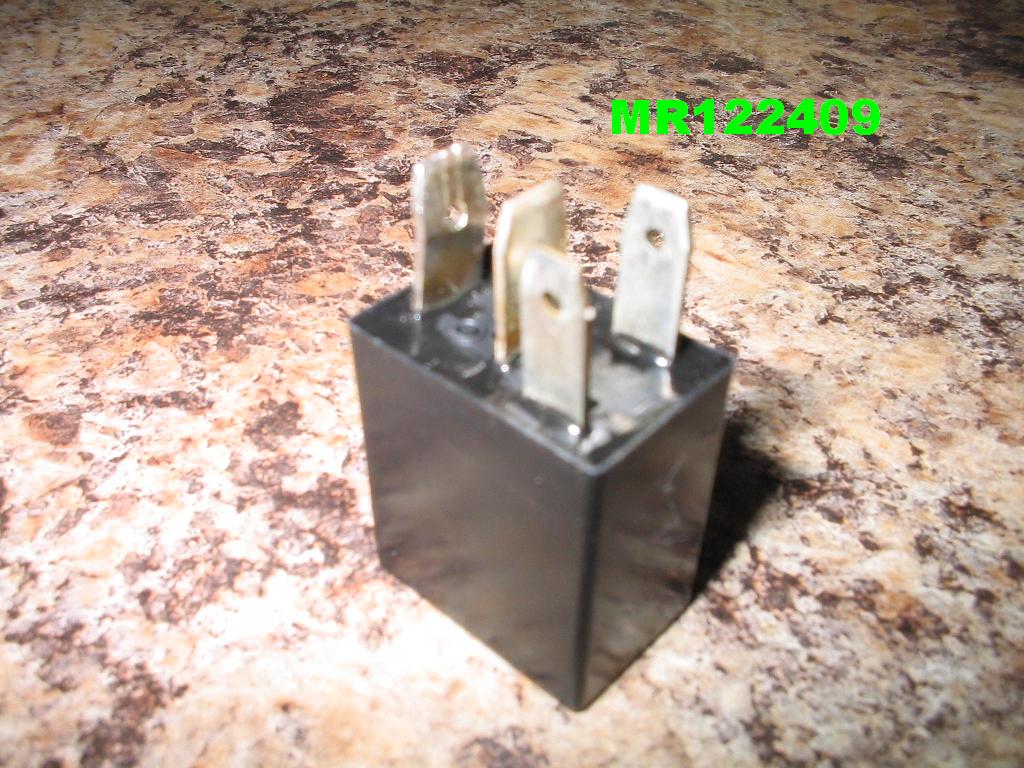 Here is a picture of the relay block looking up from the floor: See those wires circled up in the top corner? They run your doors. 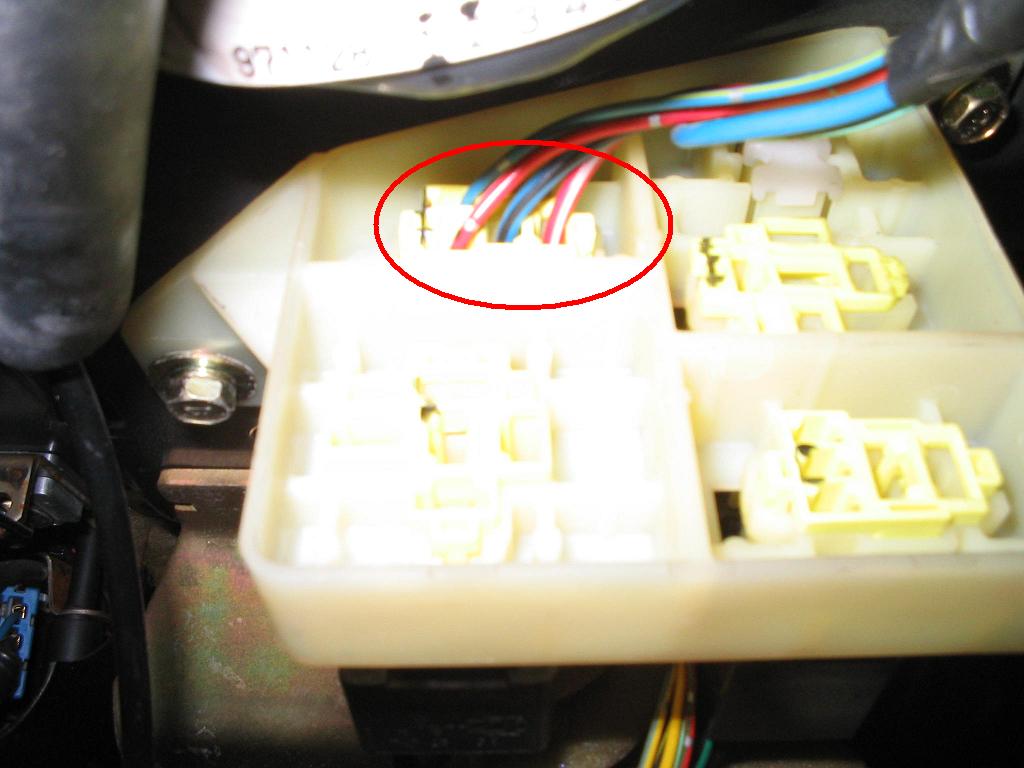 In this picture you can see the small relay that ive circled, thats the one that controls the power door options. 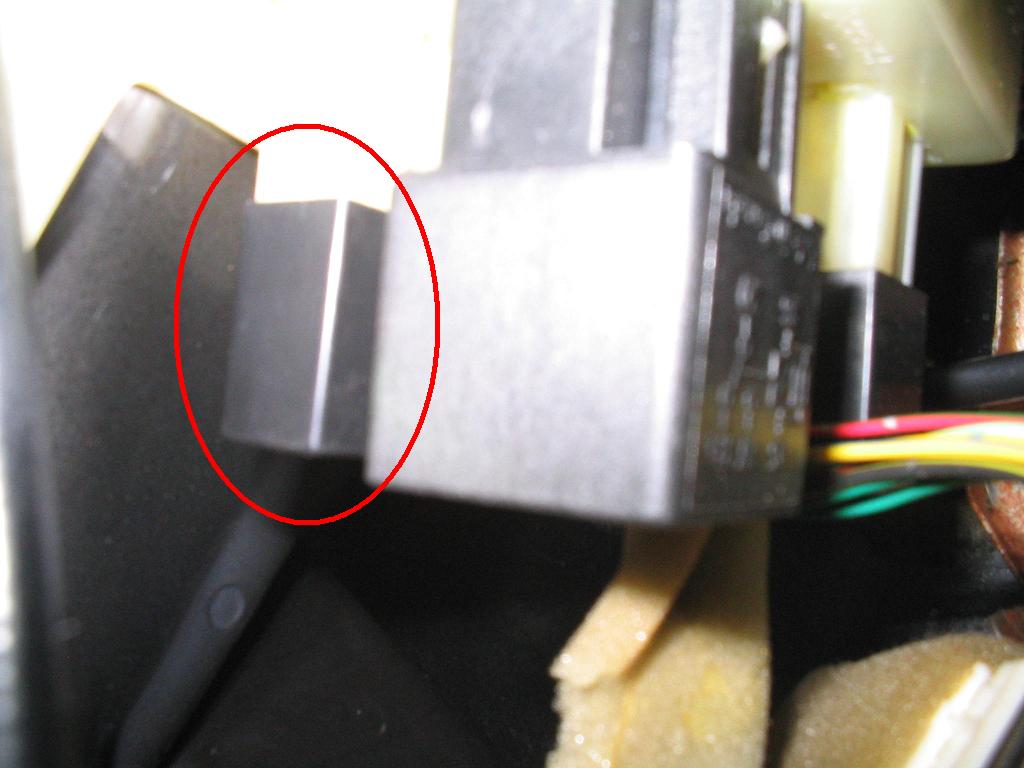 Power Window Conversion!So you want power windows, but you didn't buy a GS? No problem! All you need to do is round up a few items and you're in business! Parts and tools needed. * Power door harnesses * Window regulators * Window glass for power option (95/96 didn't have an alternate hole for the power regulator mounting in the glass. 97+ shouldn't need new glass) * Power door relay (see above article) * Switch assemblies for driver and passenger sides * Inner door panels for power options * 10 and 12mm sockets, standard and stubby 10mm wrenches, assorted phillips and flathead screwdrivers, various pick tools, 4mm allen wrench or T35 torx wrench (for latch assembly if changing it to power at the same time) * White lithium grease If you want power locks then getting a set of latch assemblies would be a good idea, there's no easier time than when you've got the windows out! Getting started! So you've got all your parts and tools, now it's time to start swapping things! First, let's look at the whole door. (Yeah, I was a bit ricey in a previous life) This is the last time it's going to look like this ^_^ 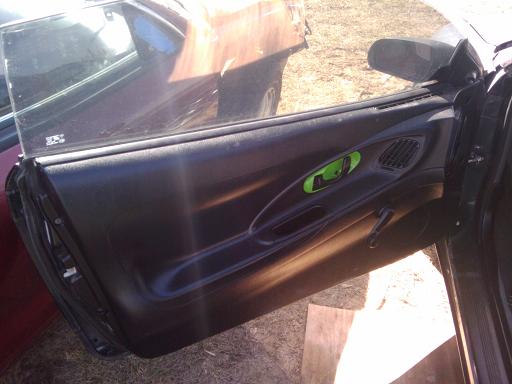 Now we'll need to remove the window crank handle. If you've never done this, it can be a pain, but you'll never need to do it again! Push the panel as far back as you can to create some space. Take your smallest screwdriver and use it to work out the little spring clip that holds the crank handle in place. It should slide right off after that. Set it aside because you'll need it later. 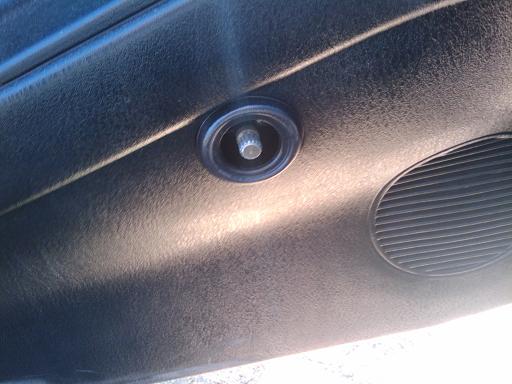 Now you'll want to remove the screws on either end of the door panel. If you're lucky enough to have unmolested doors there will be some screw caps covering the screws. Pry them off with a flathead or a pick tool and unscrew the screws 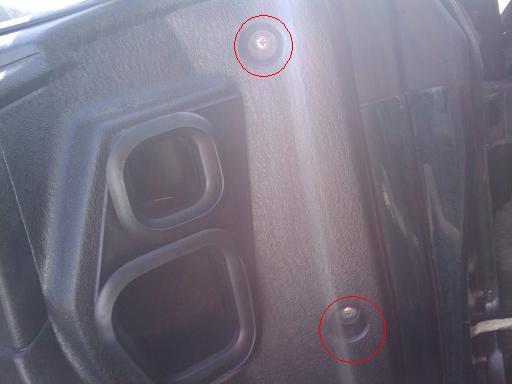  "Why won't it come off?!?!?" Because you're not done yet! Pull out the latch handle, there's a screw holding the trim piece (and the rest of the door panel) in place. Remove the trim after you unscrew it 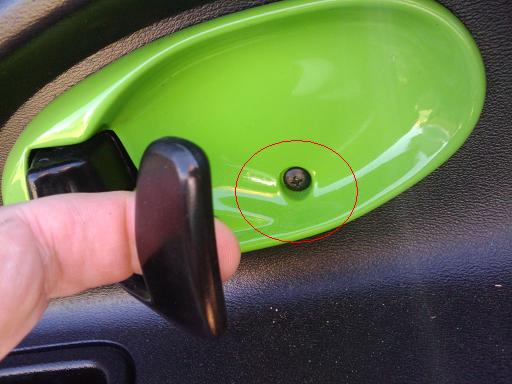 Don't forget the screw in the door pull! It might be hiding under a nice little cover. 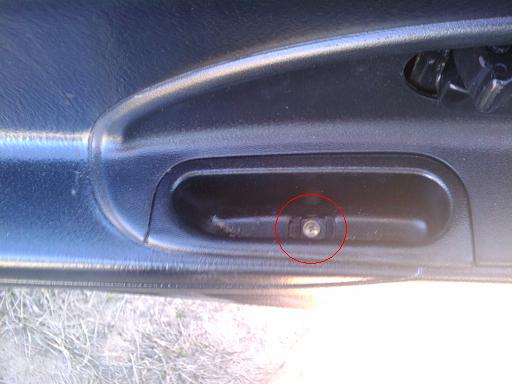 Now you can pull the door panel off. Start at one side and gently pull to pop the trim clips loose, working your way around the door. You don't want to have to run to SATAN for new clips because you got overzealous and ripped them to shreds, so be gentle and take your time. Your door should now look like this 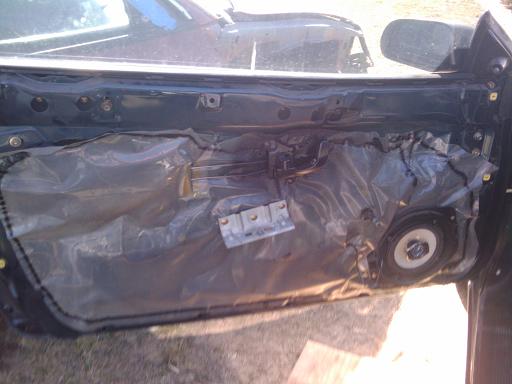 From here you can remove the inner latch handle, the door pull bracket and the speaker so that you can pull the vapor barrier off. If you like your switches working later, and you live in a damp area, you'll want to save it or plan on replacing it to prevent moisture from getting to your switches and corroding them. I live in dry ass Colorado so I just tossed it. Now we're going to remove the weather stripping to give us more access to the window glass. Start by prying the clips loose on either end of the door at the top corners. You only need to pop the clip at the very top to give access to the edges and a bolt for the mirror gusset  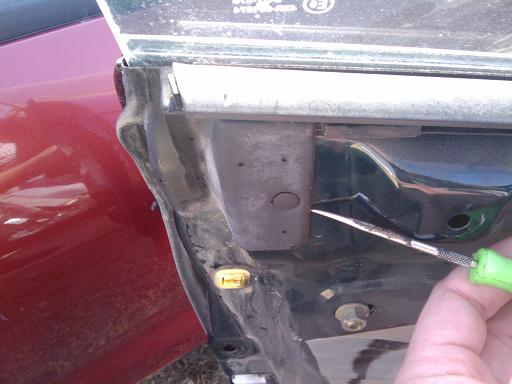 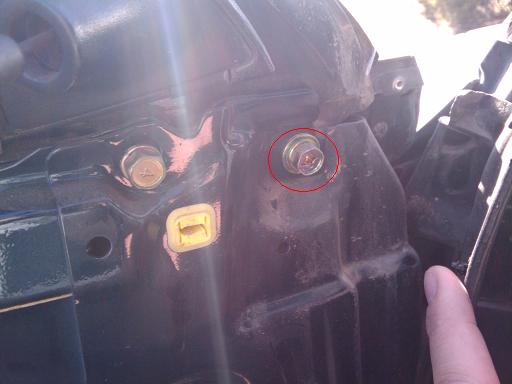 Now you can unbolt the mirror and gusset assembly. There are three 12mm bolts. once they're out you can remove the whole thing 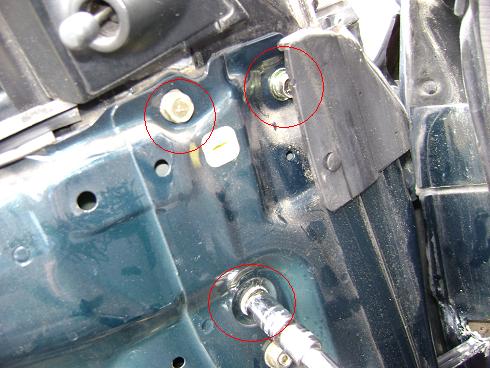 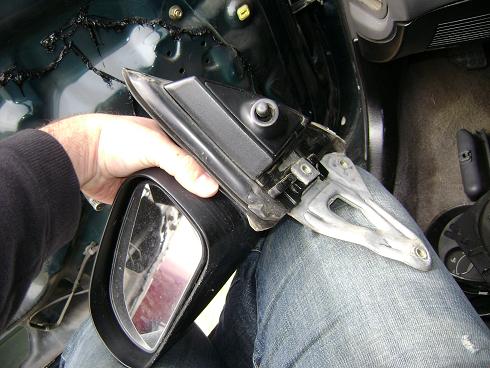 With the gusset out of the way it's a lot easier to remove the inner belt moulding. Be gentle and work your way along, it is possible to bend these things. 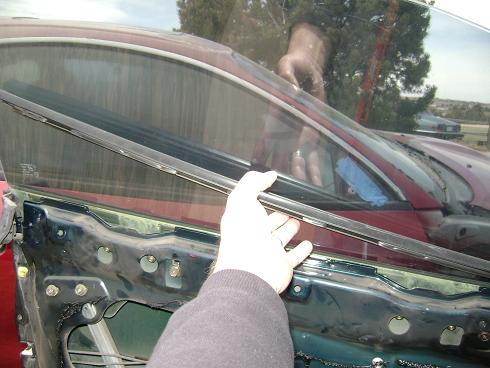 Now we can remove the outer moulding. I hope you kept your crank handle! To get to the screw at the back of the door you'll need to lower the window enough that you can get a screwdriver in there. Pry it up gently because it's REALLY easy to bend these things in the middle if you get too overzealous at one end. 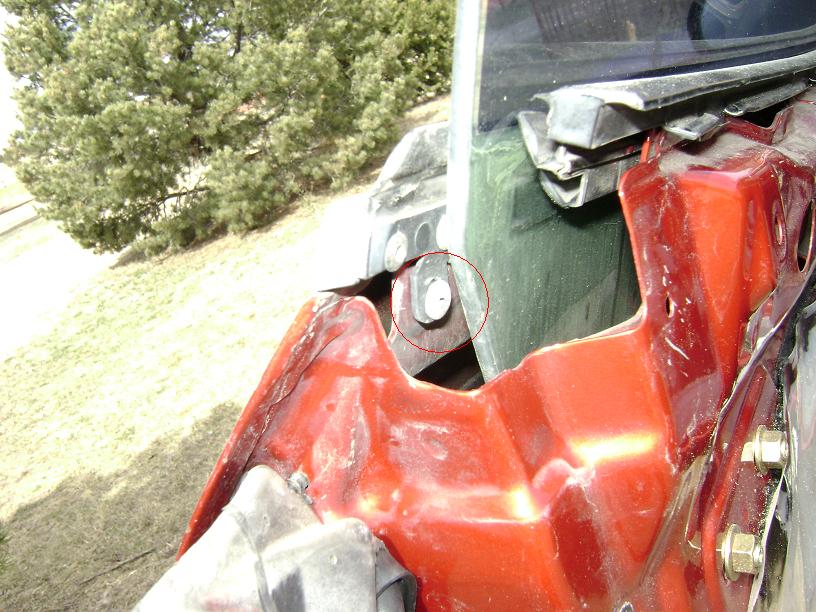 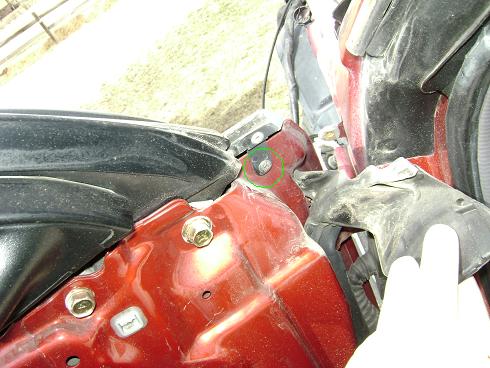 At this point your door should look something like this. (if it's a different color that's ok) 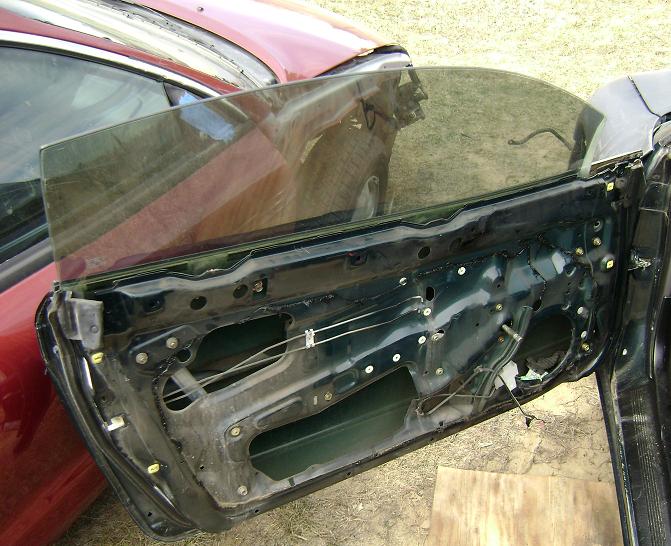 Now we need to get the pesky window stops out of the way. Get your trusty 12mm socket back out and start unbolting them! They're at the top edge of the door and you'll have 4 nuts and 2 bolts 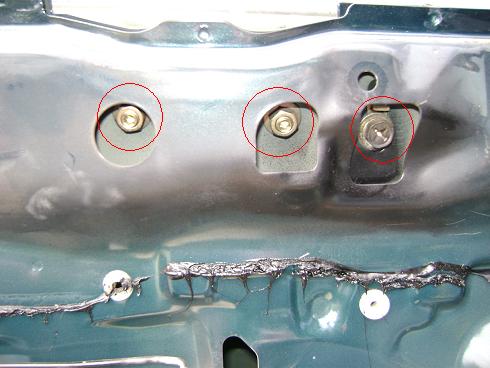 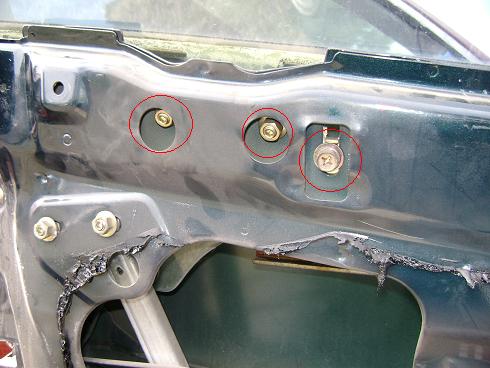 You'll pull out 2 brackets with fuzzy junk and 2 L shaped stops with rubber ends (later models had C shaped stops) They come out the top, but if one drops into the door it's not a big deal, just grab it from the bottom 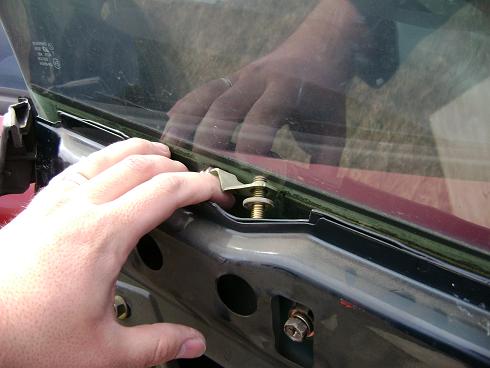 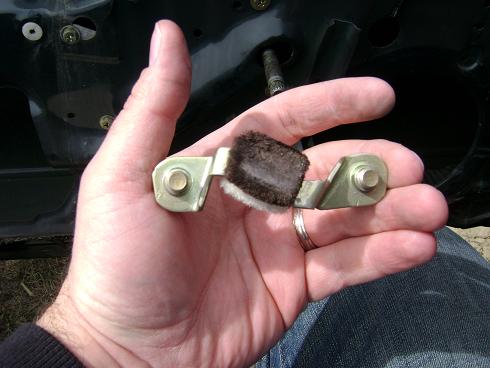 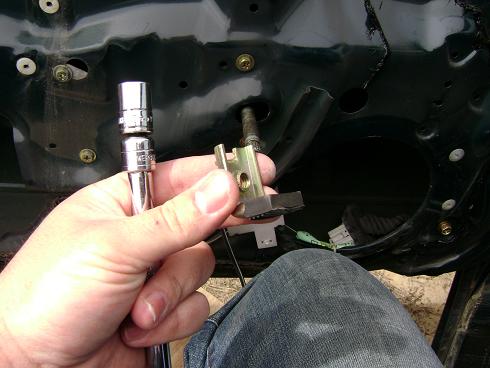 If the fuzz is matted down you can take a pick tool to it and perk it right back up! 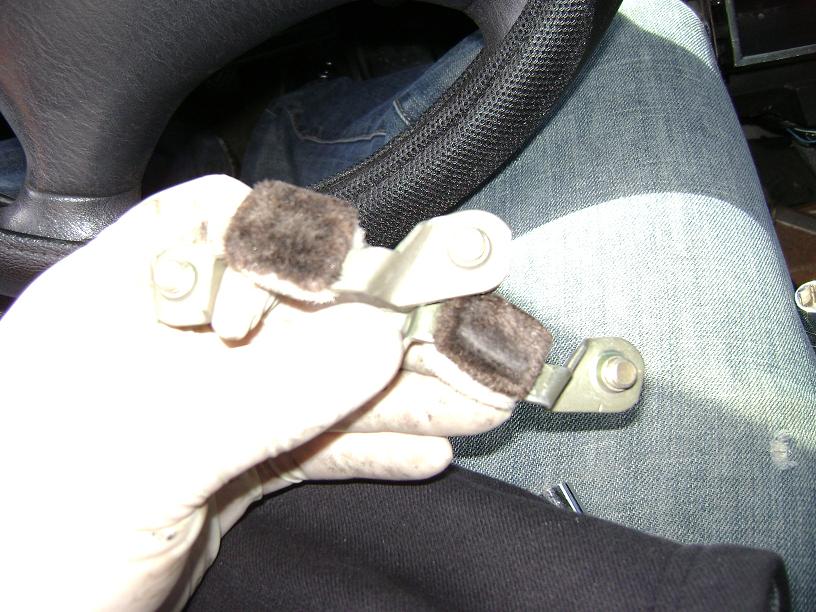 Now we're going to loosen the regulator bolts, but don't remove them. DON'T TOUCH THE BOLTS FOR THE WINDOW GUIDES! 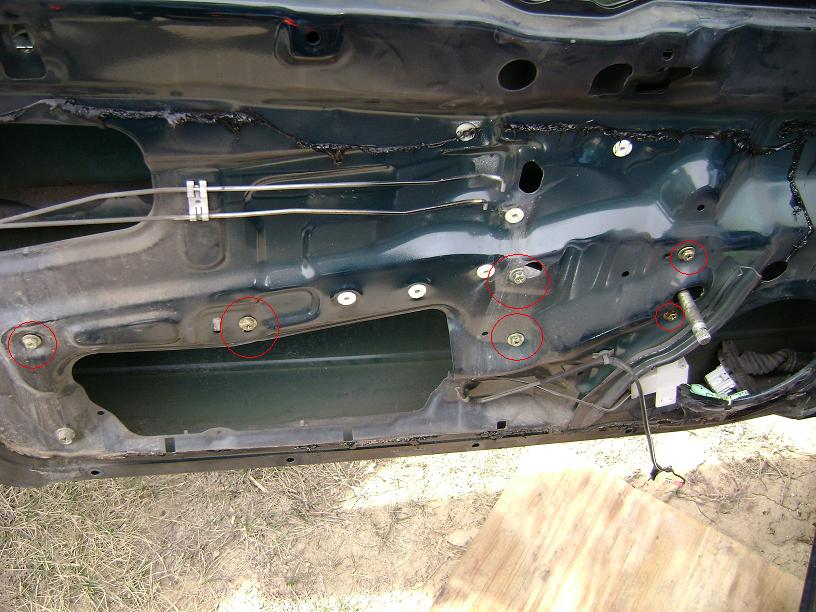 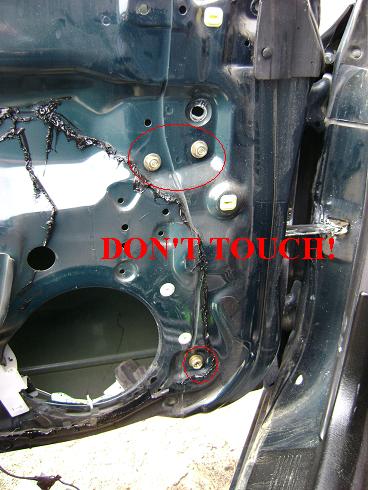 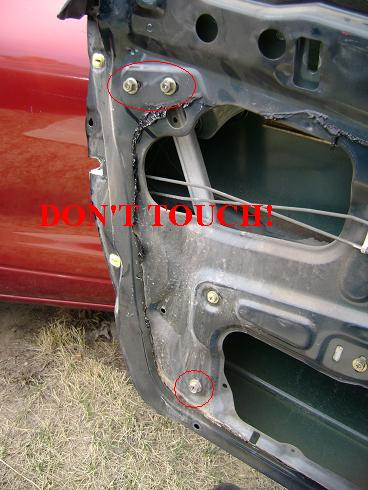 Finally it's time to remove the glass! There are two 10mm nuts holding them to the regulator, I've found that it's easier to deal with the headache of removing the nuts when the window is all the way up, because pulling the window all the way from the bottom is a serious PITA and there's a chance of the window falling off the regulator if you try to roll it up with the crank. I used wrenches because there's no clearance for a socket. The rear nut came off with a standard because you have get to it from underneath and the front one I used a stubby on to prevent damage to the glass 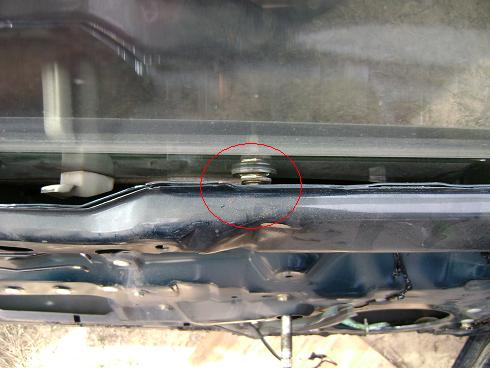 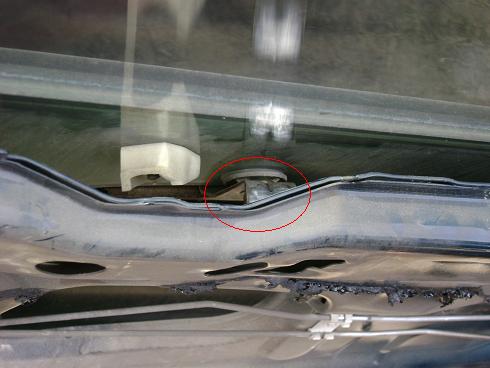 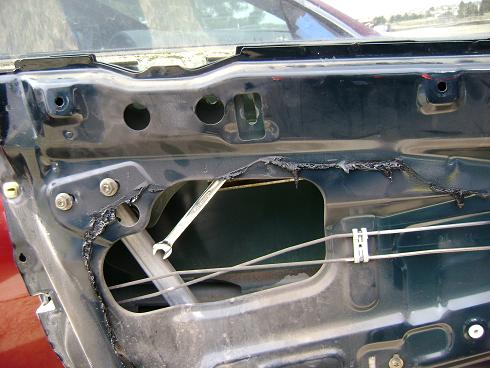  Now you just have to slip the regulator ends off of the studs that pass through the glass and lift out the glass! The rear guide may fight you when you go to lift it out. Just keep working it gently and play around with the angle you're lifting. When the back of the glass comes free from the guide rail you'll need to slide the glass forward a bit to get the guide wheel out of the larger opening for the stops. Now you can finish unbolting the regulator and slide it out the rear opening of the door frame! It's a bit of a puzzle getting the crank spindle out but keep working it and try to follow the groove in the door. 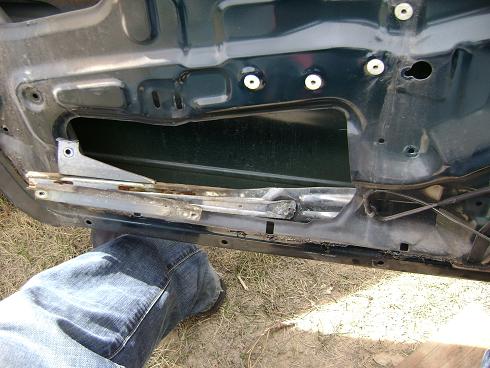 If you're switching to power door latches, now is the time to put them in. There are three T35 torx screws that hold the latch assembly in place at the back edge of the door. I used a 4mm allen wrench to get them free. You'll also need to release the rod clips that attach the latch to the handles. A simple pick tool works fine for the orange ones, but the big white one will need a flathead. Be careful with the white one, it's a locking style that breaks easily. The latch is a bit of a puzzle to get out and back in, but not impossible. Just keep gently twisting it around and eventually it'll find it's way free. 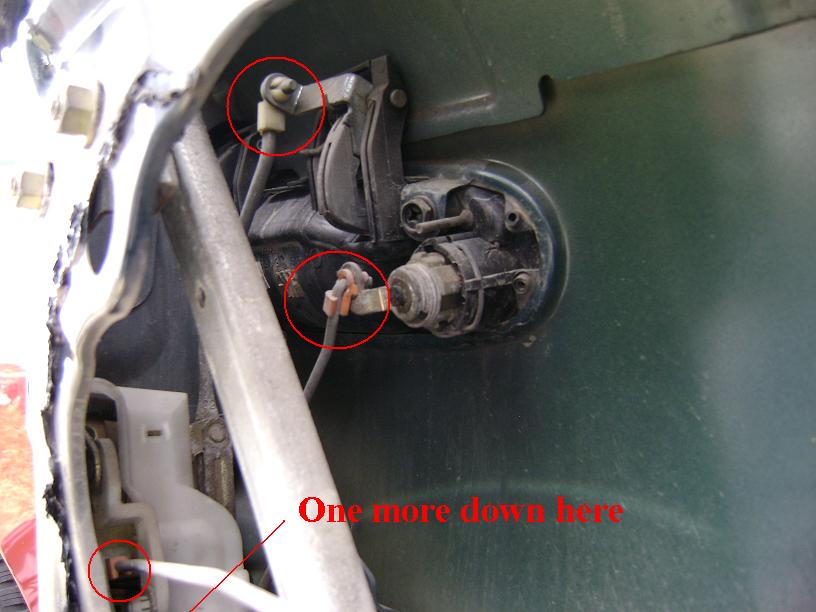 I like to make sure that everything is going to keep working smoothly so I used some white lithium grease on the moving parts of the new regulator. Pic here Now it's time to put the power regulator into the door. The easiest way I've found is to start with the bottom edge of the regulator and insert it downwards into the opening in the door. Remember, the motor points upwards. Pic to go here You'll have to work it around into the door to get it into place. Once it's roughly in place you can start putting the bolts in loosely. Always start with the bolt hole that has the large cutout just to the side, things won't line up properly if you don't. Only 2 of the original mount holes in the door will be reused, the rear slider and the one with the large cutout. The rest of the power regulator bolts line up on other holes. Make sure to leave all the bolts slightly looser than finger tight so that you can align the window later. pic to go here Let's take a look at the glass! If you have a 2Ga car (95-96) and the glass has never been replaced then your manual window glass will NOT work. The rear power regulator mount on the glass is approximately 3 inches too far back. You can, however, swap the slider from your manual windows to the power regulator. Just bend the retaining tab down so you can slide it off. Pic here Also it helps to have all your hook stops in perfect functioning order. Usually the rear stops are broken because of people opening and closing the doors by the glass. If you have 2 sets of glass, swap over the good ones for the broken ones. Don't ever let anyone open or close the doors by the glass EVER AGAIN. pic here While you're at it you might want to tighten the mounts, loose mounts are one of the biggest causes of rattling windows. Take one of the nuts that you removed and use it to tighten the whole assembly. While you're there, now is a great time to tighten up the clamp for the front guide. I like to take it off the glass, slip the plastic slider out, and clean it all up. Crush the metal portion of the guide back down slightly with some vicegrips and slip the plastic slide back in place. Pic here? Now that you've got your windows back together it's time to put them back in! Installation is pretty much the reverse of removal, but you need to be careful that your guides get lined up properly. Before I installed the glass I lubed up the guides with some white lithium grease. Make sure the nuts are tight, you wouldn't want your windows rattling now would you? To be CONTINUED... Power_Option_Mods |
| Document statistics: Last modified on 2012-10-18 14:23:38 by DarkOne |