

420A TIMING BELT REMOVAL( was done on 1998 Eclipse RS)Original Article written by: XtremeRS Pictures provided by: RRE Edited/Compiled by cs82685 Tools Needed for install: Hydrolic floor jack and piece of wood to fit under oil pan Torque wrench( need to go to at least 20 FOOT pounds, I used a click-type wrench), MUST use this to set pre-tension on new timing belt!! (I got a 1/2†drive torque wrench at Autozone for $25.00) I did mine without one and I'll tell you how later on Assortment of open end wrenches- standard and metric-- use mostly 15mm, 9/16", 1/2" and 10mm Assortment of sockets and drives( 1/4â€, 3/8â€, and 1/2†drives would be very helpful along with universal joints)-standard and metric sizes also, along with several different size extensions Crankshaft pulley puller( I used a 3 jaw 5 ton puller, anything smaller will not work, and anything larger might not fit inside pulley- trust me i found out the hard way!) You should be able to rent this from your local advance auto or autozone for free WD-40 ( grease monkey’s best friend) Good shop light( a must) Philips screw driver Special tool to hold crank pulley and cam pulleys so they don’t move when tightening or loosening( I used air tools and did not need to hold crank from turning, you will if using hand tools) There's other ways that don't require special tools and will be discussed further Jack stands 1†longer bolt for putting on Crank pulley, and a few large thick washers to fit(go to hardware store after removing original bolt form crank, to match up) believe it or not, the bolts from the body mounts of newer chevy trucks are an EXACT FIT for the crank. This is what i used, and worked great. FAQ section on belt replacement( very useful for the diagrams), print it out and have it handy Download the Factory Service Manual here: http://az2gnt.net/FSM/2gnt_420a_overhaul.pdfA LOT of PATIENCE!!! Note: I have smaller hands, so it wasn’t too bad, but still tight for room to work. If you have larger hands, it WILL be more difficult to work on! (just as a heads up) Well here are the steps to tackle this job... good luck! Note: I may be leaving out some procedures and replacements that other may recommend. My car at the time had almost 60k miles on it. I did not replace camshaft oil seals, nor did I replace the water pump or timing belt tensioner. If you feel you must do these, go ahead and do them. Its fairly straight forward when everything is apart, just a few more things to take apart. Refer to the FAQ section for cam seal replacement. Also, I had the use of a car lift and air tools, which made it very useful. But don’t worry, it can still be done without! DISCONNECT NEGATIVE BATTERY CABLE FOR SAFETY! ( use your head when jacking up car, and use jack stands for safety also). Step 1: Raise the front of car and remove the passenger wheel. Step 2: Now you will see a black cover hiding the crank pulley. You need to remove this. There are 3 bolts, and 2 plastic philips head screw clips holding it on. Step 3: You now can see the crank pulley, and a better view of alternator and belts. Loosen the alternator by the 1 bolt on the bottom, and access the top bolt by the top of the car. There is an adjustment bolt on the firewall side of the alternator, and is accessed from underneath the car. Loosen this bolt to give slack in belt. You cannot remove belt at this time because the other accessory belt is still on. Step 4: Back to working under the hood- lift up on the anti-freeze overflow tank, it comes right up and off. Remove the 2 bolts that hold the overflow tank bracket on the car, and remove the bracket. 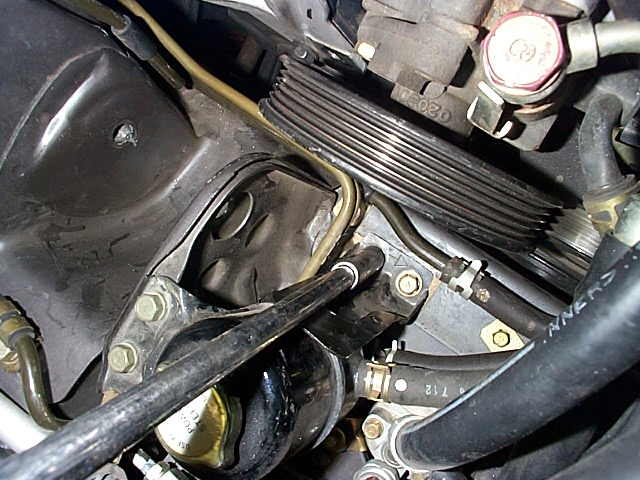 Step 5: Now get the hydrolic floor jack, and put a piece of wood under the oil pan, and jack up the motor just a lilttle, just enough to take pressure off the motor mount. Remove the 1bolt, and 2 nuts that hold on the motor mount on the passenger side of the motor. Step 6: Now remove the whole motor mount from the car by taking out the 1 through bolt. Now you have some room to work. Raise the motor up as much as you can(to get bolt removal clearance for power steering pump pulley holes). Step 7: Remove the power steering pump. 2 bolts are accessed through the pulley holes, and there is 1 bolt on the rear of the pump. Set pump aside enough to remove the bracket and get at the 2 bolts that bolt onto the engine. Its really tight here, so be patient, and use small ratchets open-end wrenches. This can be time-consuming because of space limitations. If you don’t have A/C, then it will be easier because there are no hoses to get in the way. There is one more bolt on the P/S bracket, on the pass side of the motor, on the motor mount plate. Remove this and the P/S mounting bracket should come off, along with the drive belt. (It may be helpful to loosen the belt idler pulley to give more belt slack) Remove the belt if not done already, remove alt belt. When you remove the bolts for the PS pump, you should be able to remove the belt and get it out of your way Step 8: Study this diagram in detail so you know what you will be looking at and understand how everything goes together: 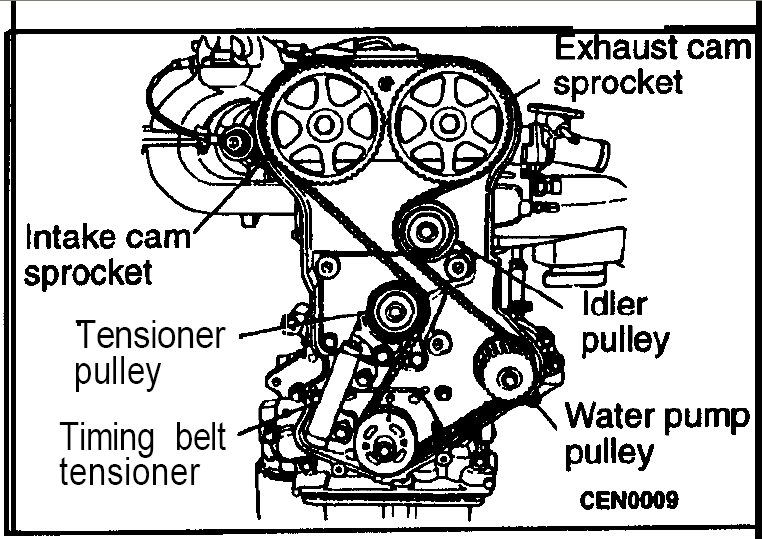 Step 9: Now we have to remove the crank pulley. Lower the motor back down( you can re-arrange some of these steps to save some time, just use your head when it comes to it.) Now I must say this was the most frustrating part of the whole job, mostly because I didn’t have the proper puller! I started out with too small of puller, and bent it up. I then got too large a puller which the jaws wouldn’t fit into the center of the crank pulley. I then proceded to use this puller on the outside of the pulley, in the belt grooves, and totally destroyed the factory pulley!! You MUST have a 3 jaw, 5 ton puller to remove this pulley! You MUST remove the pulley by the center of it!( you will see what I mean) Luckily, I was installing an underdrive pulley, so I really didn’t care if I broke the pulley. Remove the crank pulley bolt, and put in the longer bolt, and leave about and inch of bolt out. Using the correct puller, put tension on it, and I used a propane torch to heat up the center hub, being careful not to burn anything.( I’m not sure if this helped at all, but thought I would add it). I used an impact wrench to tighten the puller, but any socket wrench will do also, just a bit more difficult. This part WILL take some time! That pulley is on VERY, VERY tight!!! I did not have the convenience of an impact gun and therefore used a wrench with a pipe on the end of it to hold the puller in place and then a breaker bar and socket to tighten the bolt for the puller  Step 10: With the pulley off, now remove the 2 timing belt cover bolts at the bottom of the cover. Step 11: Now you have to remove the motor mount plate that’s in front of the timing belt cover. This is NOT going to be easy!!! There are 3- 4†bolts that hold the plate on the motor, and thg problem is that there is only about 2" of clearence between the frame and the motor. There are basically 2 different ways to get this off. You can struggle and break off the front half of the timing cover and get the plate to move around a little and get the bolts out, which is very difficult and very time tiime-consuming. NOTE: The BEST way to do this without drilling holes through your frame is to remove the front motor mount (it's only two bolts)and then jack the motor up as high as you possibly can. It will take some adjustments up and down on the motor to get all the bolts out, but is not too hard You can drill holes through the frame as suggested in the original article, but it is not the best idea and has therefore been left out here If you are still at a loss, you can check out this article; Removal_of_Passenger_Side_Motor_Mount_Plate_Only to see if the description with pics may help you out.After the motor mount plate is off, you have to remove the timing belt inspection cover at the top of the cover. After this is off, the cover should come up and off. 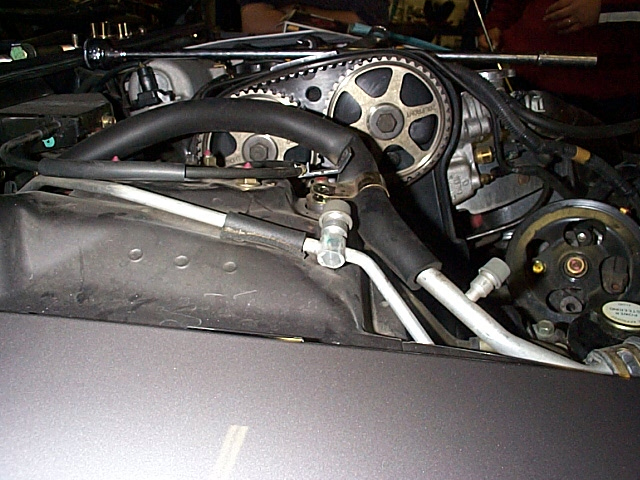 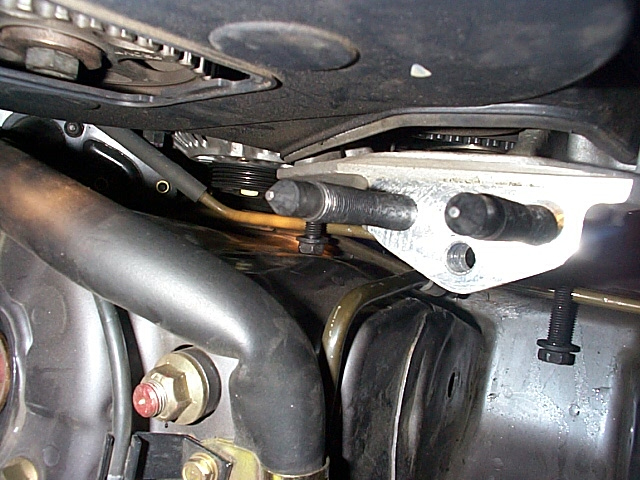 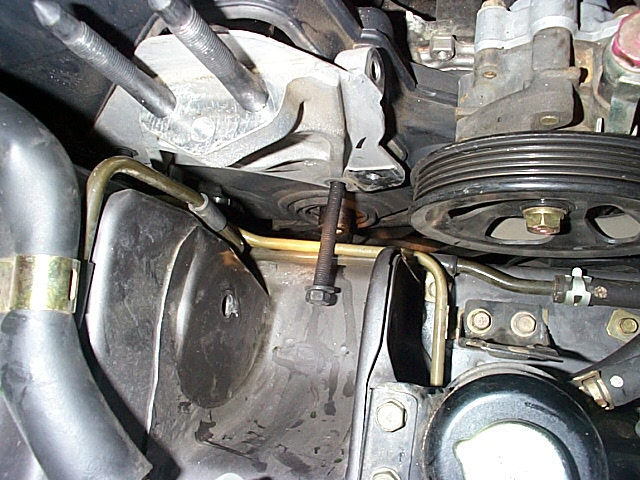 Step 12: Now we should have full access to the timing belt and components. I replaced the belt, the tensioner pulley, and the timing belt idler pulley. If you are replacing cam seals, then you have to remove the back half of the timing cover, and the cam sprockets. Refer to the FAQ section on Timing belt replacement. Align the timing marks on the cams(its a little notch on the outside of the sprocket, again refer to the diagrams in the FAQ section, its very useful! Align the timing mark on the crank to TDC. The cams and the crank timing marks should be all lined up at the same time, rotate the motor until they are. The FAQ section says to start removing the tensioner bolts, but before you do, get a small nail,(I used a small rivit, its all i could find, but worked great) and put it through the little hole on the tensioner. This nail or pin should go through the tensioner body, the center plunger pin, and then out again through the body. This is to hold the tensioner plunger compressed. The FAQ section says to remove it, then compress the plunger in a vise to get the retaining pin in, but i found its much easier to do this before you take it out, and with the tension already on it. Now remove the 2 bolts that hold on the tensioner, and the belt will become loose. Set aside the tensioner body. Now I then replaced the idler pulley, and the whole bracket that holds on the tensioner pulley(thats what the dealer gave me, you might be able to get just the pulley) for preventative maintenance. I noticed that the tensioner pulley’s wear seemed fine, but there was a little more wear on the idler pulley. I recommend replacing both, if either of these fail, say good-bye to your valves! I asked the service dept at the dealership about replacing the tensioner, and they said they never heard of it going bad(just as a side note) I debated on replacing the water pump, but I decided not too, with only having 60k on the motor. If you feel you should do it, go ahead and replace it. I have not really had any good info on how long they last.(Just go do it anyway) 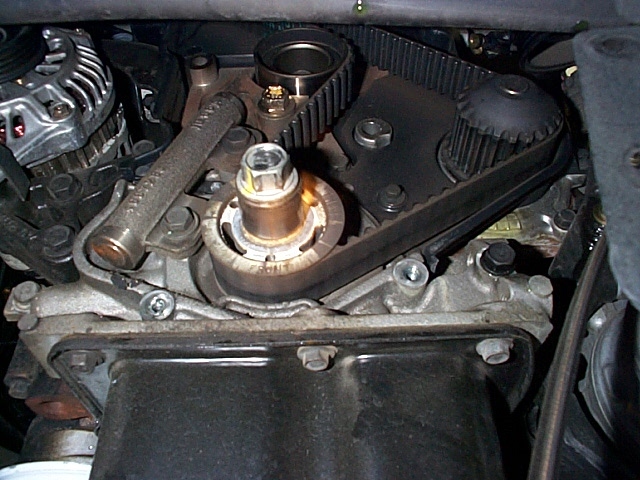 Step 13: Now its time to reinstall new belt. ( be sure the tensioner body is still off the motor). Make sure the crank mark is 1 notch BEFORE TDC( the little arrow on the crank pulley is towards the firewall side of the TDC mark on the block.) Make sure the cams timing marks are set together also. Take the new belt and starting at the crank, work it around the water pump, the idler pulley, the right side cam sprocket, then the left( being sure not to move the cams any), then the tensioner pulley. While doing this, try to put some tension on the tensioner pulley to keep the belt snug. This process did take me a while to get right. Just be sure to keep things lined up and to have that half notch lined up on the TDC mark on the crank.( this will take up the slack in the belt to make it fit right on the cam sprocket, you will see what Imean when you do it). Now move that TDC half notch adjustment to TDC.( turn crank until the arrows are in fully lined up now, this takes up the pre-mentioned slack) Now have a torque wench on hand and also the tensioner body. Put the torque wrench on the tensioner pulley bolt, and put on 20 FOOT POUNDS of tension on the pulley. This puts tension on the timing belt to keep it snug, and to set proper belt tension. While holding this tension, take the tensioner body and put it against the block in its mounting location, and insert the mounting bolts. Keeping the tension on the pulley, move up the tensioner body as tightly as you can up against the tensioner pulley. Tighten down the tensioner mounting bolts at this time. Let off of the torque wrench, and if everythings right, you should be able to pull out the small nail or pin you put in earlier. If it doesn’t come out, then your tension is NOT RIGHT! If its not right, loosen the tensioner body again and repeat with the torque wrench. It took me a few times to get this right, just push up on the tensioner as tightly as you can, then bolt it down. Instead of doing this since I did not have a torque wrench, I instead used a flathead screwdriver in order to push the tensioner up against the tensioner pulley until proper tension was achieved and then bolted the tensioner back into place. Not the best way to go about it, but it worked for me. The same thing applies with the tension though, if your pin doesn't come out of the tensioner easily or at all, your tension is incorrect and you have to redo it. Another note, be careful if you choose to do it this way because I pulled one of the bolts for the tensioner out and stripped the first few threads in the hole which resulted in retapping the hole Step 14: Now turn the crank 2 revolutions to make sure the timing marks still line up. If it does, then you are all done with the belt replacement! Now you have to put everything back together! Note: If you are replacing the alternator, its much easier to do it now, with the motor in its lowered position. Just remove the mounting bolts, and electrical hookups, and set it aside resting on the drive axle. You now have to remove the black bracket that holds on the alt. It has 3 bolts that need to come off, and with the bracket out of the way, there is just enough room to take out the alternator. Start assembling the parts in which you took them off. (motor mount bracket, P/S and bracket) Step 15: Crank pulley install: Take your pulley and push it on the crank as much as you can( I just barely got it to stay on by itself), and put in the longer crank bolt with the washers. Be sure you have at least 1 thick washer to help distribute the forces of the bolt “pulling†on the pulley. Using an impact wrench, it wasn’t too bad at all, but if your using a wrench, it may take some effort and some time. Also, if using a hand wrench, you will need something to hold the crank from turning over the motor. Using an impact wrench, the motor did not turn over. I chose to try heating it up to press on and got it on a little bit, then decided to use a 3lb sledge hammer to get it on the rest of the way :D Just be careful you don't damage the end of the crank and you'll be ok Step 16: Reinstall NEW alternator belt first, then NEW accessory drive belt and tighten everything down, being sure to get the belts tight so they don’t squeal. The general rule of thumb is to have no more than a 1/2" of belt deflection on the greatest distance of belt between pulleys. Use the alternator tension bolt to tighten it down, and then use the accessory belt idler pulley to put tension on that belt. Step 17: With all the belts installed and tightened, you can put back on the motor mount and the anti-freeze over-flow tank and tank bracket. NOTE: I’m not going into detail on re-assembly, just do everything in reverse of removal This should cover most of the timing belt replacement process. If anyone has any tips, tricks, or info on how to do any of this job, please feel free to add them. I hope this is helpful to all who want to do this themselves. Just remember, take your time, and be patient, and most of all , have the PROPER TOOLS!! I would not recommend doing this job unless you are good with tools, and have some mechanical ability. Note: I’m not responsible for the accuracy, or safety of theese procedures. I wrote this to best of my knowledge, and this is exactly how i performed my timing belt replacement on my car. http://www.geocities.com/eclipsed4evr98/Timingbeltprocedure.html Note, all italicized text has been added to the original article. Thank you everyone who contributed to this article in any way. |
| Document statistics: Last modified on 2009-12-19 09:55:02 by bullettdsm |